Introduction
This article describes how to install GPU-accelerated TensorFlow 2.8 on GPUMart's lite GPU server.
Step1 Installing Nvidia Graphics Driver
Step2 Install CUDA Toolkit
Step3 Install CUDNN
Step4 Prepare TensorFlow Dependencies and Required Packages
Step5 Install TensorFlow
Step6 Verify Successful Installation
Installation Requirements
TensorFlow is supported on the following 64-bit systems:
- Python 3.7–3.10
- Python 3.10 support requires TensorFlow 2.8 or later.
- Python 3.9 support requires TensorFlow 2.5 or later.
- Python 3.8 support requires TensorFlow 2.2 or later.
- pip 19.0 or later
- Ubuntu 16.04 or later (64-bit)
- GPU support requires a CUDA®-enabled card
GPUMart's Lite GPU Server Configuration
- Nvidia GeForce GT 730
- Ubuntu 20.04.4 LTS
- Python 3.8.10
- pip 20.0.2
# Command Reference
# check server os
administrator@ubuntu:~$ lsb_release -a
No LSB modules are available.
Distributor ID: Ubuntu
Description: Ubuntu 20.04.4 LTS
Release: 20.04
Codename: focal
administrator@ubuntu:~$ uname -a
Linux ubuntu 5.4.0-107-generic #121-Ubuntu SMP Thu Mar 24 16:04:27 UTC 2022 x86_64 x86_64 x86_64 GNU/Linux

# check gpu card
administrator@ubuntu:~$ hwinfo --gfxcard --short
graphics card:
nVidia GK208B [GeForce GT 730]
Super Micro X9SRL-F
Primary display adapter: #18

# check python version
administrator@ubuntu:~$ python3 -V
Python 3.8.10
administrator@ubuntu:~$ pip -V
pip 20.0.2 from /usr/lib/python3/dist-packages/pip (python 3.8)
1 Installing Nvidia Graphics Driver
The first step is to install an NVIDIA graphics driver on your Linux system. An Nvidia graphics driver is typically installed on our Linux system by default. If you don’t find this driver, please follow the steps below to install it.
1.1 Find the right Nvidia Driver.
Go to the
Nvidia Driver Downloads page and select the GPU and OS version from the drop-down menus to find the right Nvidia driver for your system.
1.2 Download and install the driver
Right-click on the green download button to open the system menu and copy the download address. Then, we can download the display driver with the wget command and install it.
# copy link and download
wget https://us.download.nvidia.com/XFree86/Linux-x86_64/470.103.01/NVIDIA-Linux-x86_64-470.103.01.run

# install display driver
sudo sh NVIDIA-Linux-x86_64-470.103.01.run
Make sure to install NVIDIA's 32-bit compatibility libraries.
The installation completes if you see the following screen.
1.3 Make the driver take effect
Restart your system via the command below to ensure that the graphics driver takes effect.
sudo reboot
After the system reboots, log back into the GPU server and you can verify the driver version using the following command:
nvidia-smi
1.4 Troubleshoot Installation error
administrator@ubuntu:~$ nvidia-smi
NVIDIA-SMI has failed because it couldn't communicate with the NVIDIA driver.
Make sure that the latest NVIDIA driver is installed and running.
If you are getting this message, please re-install the driver.
2 Install CUDA Toolkit
1.1 Find the right CUDA Toolkit
A CUDA Toolkit is essential for you to use the TensorFlow with GPU. Navigate to the
CUDA download page and describe your target platform to find the right CUDA toolkit.
1.2 Install the CUDA Toolkit
Install the CUDA toolkit by following the official documentation.
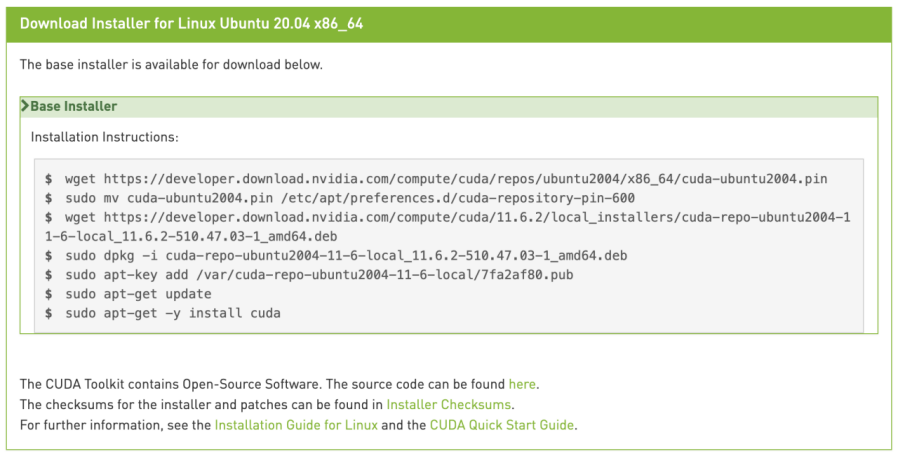
#Pin file to prioritize CUDA repository:
wget https://developer.download.nvidia.com/compute/cuda/repos/ubuntu2004/x86_64/cuda-ubuntu2004.pin
sudo mv cuda-ubuntu2004.pin /etc/apt/preferences.d/cuda-repository-pin-600

# download deb file
wget https://developer.download.nvidia.com/compute/cuda/11.6.2/local_installers/cuda-repo-ubuntu2004-11-6-local_11.6.2-510.47.03-1_amd64.deb

#Install repository meta-data:
sudo dpkg -i cuda-repo-ubuntu2004-11-6-local_11.6.2-510.47.03-1_amd64.deb

#Install the CUDA public GPG key:
sudo apt-key add /var/cuda-repo-ubuntu2004-11-6-local/7fa2af80.pub

#Update the Apt repository cache:
sudo apt-get update

#Install CUDA:
sudo apt-get -y install cuda

#To include all GDS packages:
sudo apt-get install nvidia-gds

#Reboot the system
sudo reboot

#Some actions must be taken after the installation before the CUDA Toolkit and Driver can be used.
#Note that the paths change when using a custom install path with the runfile installation method.
export PATH=/usr/local/cuda-11.6/bin${PATH:+:${PATH}}
export LD_LIBRARY_PATH=/usr/local/cuda-11.6/lib64\${LD_LIBRARY_PATH:+:${LD_LIBRARY_PATH}}
The default installation location for the toolkit is /usr/local/cuda-11.6:
The /usr/local/cuda symbolic link points to the location where the CUDA Toolkit was installed. This link allows projects to use the latest CUDA Toolkit without any configuration file update.
1.3 Verify successful installation
It is important to verify if the CUDA toolkit can find and communicate correctly with the CUDA-capable hardware. To do this, you need to compile and run some of the sample programs located at
https://github.com/nvidia/cuda-samples.
3 Install cuDNN
Once the CUDA Toolkit is installed, download
cuDNN v8.4 Library for Ubuntu 20.04_x86_64 and install it by following the official documentation.
# Due to access restrictions, if you can't download using wget, please download to local and then upload to server
wget https://developer.nvidia.com/compute/cudnn/secure/8.4.0/local_installers/11.6/cudnn-local-repo-ubuntu2004-8.4.0.27_1.0-1_amd64.deb
sudo dpkg -i cudnn-local-repo-ubuntu2004-8.4.0.27_1.0-1_amd64.deb
sudo apt-get update

#Install the cuDNN library
sudo apt-get install cudnn
administrator@ubuntu:~$ sudo apt-get install cudnn
Reading package lists... Done
Building dependency tree
Reading state information... Done
E: Unable to locate package cudnn
If you are getting the above error message, please install the cuDNN library via the following commands
sudo apt-get install libcudnn8=${cudnn_version}-1+${cuda_version}
sudo apt-get install libcudnn8-dev=${cudnn_version}-1+${cuda_version}
Replace the ${cudnn_version}/${cuda_version} with the versions. In this case, the version information is like below
- ${cudnn_version} is 8.4.0.*
- ${cuda_version} is cuda10.2 or cuda11.6
So the command should be:
sudo apt-get install libcudnn8=8.4.0.27-1+cuda11.6
sudo apt-get install libcudnn8-dev=8.4.0.27-1+cuda11.6
4 Prepare TensorFlow dependencies and required packages
Use the following command to install TensorFlow dependencies and required packages.
$ sudo apt-get install libcupti-dev
5 Install TensorFlow
Now that the prerequisites are installed, we can build and install TensorFlow.
See the
pip install guide for available packages, systems requirements, and instructions. The TensorFlow pip package includes GPU support for CUDA®-enabled cards. This guide covers GPU support and installation steps for the latest stable TensorFlow release.
# Requires the latest pip
pip install --upgrade pip

# Current stable release for CPU and GPU
pip install tensorflow
6 Verify Successful Installation
Let’s quickly verify a successful installation.
First, close all open terminals. Then, open a new terminal.
Change directory (cd) to any directory on your system other than the TensorFlow subdirectory from which you invoked the configure command.
Invoke python: type python in the command line
Input the following short program:
# on lite plan
administrator@ubuntu:~$ python3
Python 3.8.10 (default, Mar 15 2022, 12:22:08)
[GCC 9.4.0] on linux
Type "help", "copyright", "credits" or "license" for more information.
>>> import tensorflow as tf
>>> print("tensorflow_version", tf.__version__)
tensorflow_version 2.8.0
>>>
>>> tf.test.is_built_with_cuda()
True
>>>
>>> tf.config.list_physical_devices('GPU')
[PhysicalDevice(name='/physical_device:GPU:0', device_type='GPU')]
>>> print("Num GPUs Available: ", len(tf.config.list_physical_devices('GPU')))
Num GPUs Available:  1
>>>
>>> import tensorflow.python.platform.build_info as tf_build_info
>>> print(tf_build_info.build_info)
OrderedDict([('cpu_compiler', '/dt7/usr/bin/gcc'), ('cuda_compute_capabilities', ['sm_35', 'sm_50', 'sm_60', 'sm_70', 'sm_75', 'compute_80']), ('cuda_version', '11.2'), ('cudnn_version', '8'), ('is_cuda_build', True), ('is_rocm_build', False), ('is_tensorrt_build', True)])
>>> print("cuda_version", tf_build_info.build_info['cuda_version'])
cuda_version 11.2
>>> print("cudnn_version", tf_build_info.build_info['cudnn_version'])
cudnn_version 8
>>>
If the output shows "tensorflow_version 2.8.0", "Num GPUs Available: 1" and so on, it tells TensorFlow is using GPU acceleration from inside the python shell.
Congratulations! TensorFlowGPU is installed successfully.